The Windows Subsystem for Linux lets developers run a Linux environment on a Windows OS, which is considerably lighter than VMs. The following is the first post of a series that will detail the deployment of python applications in a Linux container on Azure.
-
Installation of WSL can be carried out by following the steps listed here.
-
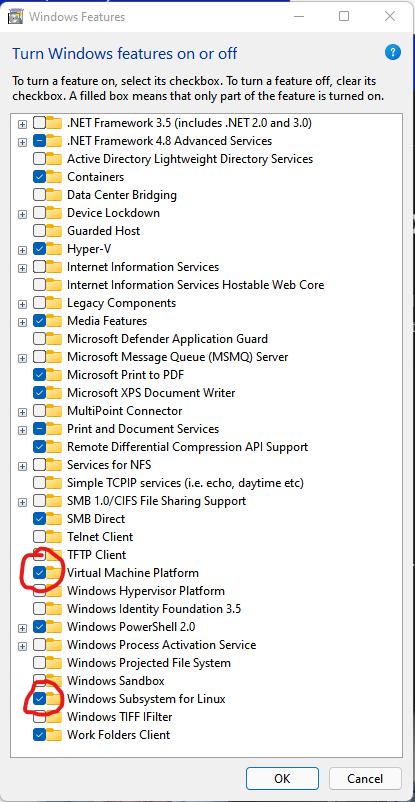
It is necessary to enable two features to use the WSL environment:
- VM Platform
- Windows subsystem for Linux.
They can be verified (or enabled) from the Windows features dialog (type optionalfeatures.exe in CMD prompt)

- Set WSL 2 the as default version - performance is much better.
- A Linux distribution is required to be installed on Windows. In this example, I will refer to an Ubuntu distro. These can be downloaded for the Widows store or directly from here. After installation, the Linux system will request a username and password.
-
Install Docker desktop from here so that there is good visibility of Docker containers.
I use VSCode as my preferred IDE, and a couple of extensions are necessary on this platform:
- The Docker Extension, so that we can manage docker containers properly.
- Remote - WSL Extension so that folder manipulation can be carried out on the Windows subsystem for Linux.
Connecting to the Windows Subsystem for Linux from VSCode is then very easy.
- Click on the Open a Remote Window button

- Select New WSL Window command or New WSL using Distro… if multiple Linux distributions are installed. This will open a new VSCode window running connected to WSL.
Upon selecting a project folder and opening (or creating) a python file, VSCode will ask to install the recommended extensions for python in this subsystem. Once the Python extensions are installed, the relevant interpreter can be selected.
Being a ‘new’ subsystem, python libraries must be installed. As we now have a ‘new’ subsystem, we must install python libraries. It is recommended to execute the following steps if the pip command does not work:
- Update package info;
sudo apt-get update - Download all upgrades;
sudo apt-get upgrade - Reinstall pip;
sudo apt-get install python3-pip
This should enable commands like pip install numpy to work.
As a test, we use the following simple program that adds two numpy arrays.
import numpy as  np

a=np.random.rand(3,3)
b=np.random.rand(3,3)

print(a)
print(b)
print(a+b)
The application can be executed by using the usual command Python: Run Python file in terminal or by keying in python3 «filename.py» in the terminal.