Introduction
The Azure Machine Learning SDK for Python lets us interact with the Azure Machine Learning service using a Python environment. This post will discuss how to create, manage, and use Azure Machine Learning Workspaces, Computes, Datasets and Datastores using the Azure Machine Learning SDK for Python.
Create a Workspace
Creating a workspace is shown below. The create method required a name for the workspace, a subscription ID, a resource group (that is created for the workspace by setting the create_resource_group flag to true), and a location.
To reuse the workspace in the future, creating a JSON file with the workspace details is useful. Saving this file is done through the write_config method. The workspace details are written to a file called config.json, which can be used to get a workspace object by using the Workspace.from_config method.
from azureml.core import Workspace
import os

SUBSCRIPTION_ID = 'copy and paste subscription id here'

config_path = os.path.join(os.path.dirname(os.path.realpath(__file__)), '.azureml')

ws = Workspace.create(name = 'wsdeleteme',

                    subscription_id = SUBSCRIPTION_ID,

                    resource_group = 'rgdeleteme',

                    create_resource_group=True,

                    location = 'West Europe')

ws.write_config(path=config_path, file_name="config.json")
During the creation of an Azure ML Workspace, several resources are created, namely an Apps Insights resource, a Key Vault and a storage account. The names of these resources are the workspace’s name with some characters appended to it. It is also possible to define pre-created Apps Insights, Key Vault or storage account, and in this post, we will see how to do this for the Storage account. We also notice that creating the workspace can create a resource group. In this example, we will make our own to be used in the rest of the post.
To keep the code as clean as possible, we created a constants.py to centralize the names of resources and other parameters necessary for creating the workspace. You will note that the parameter-names are mostly derived from parameter PROJECT_NAME, the name of this project, adding a prefix to indicate the resource type.
SUBSCRIPTION_ID = 'copy and paste subscription id here'

PROJECT_NAME = 'azuremlproject05'

RESOURCE_GROUP_NAME = f'rg{PROJECT_NAME}'

LOCATION = 'West Europe'

STORAGE_ACCOUNT_NAME = f"sa{PROJECT_NAME}"

CONTAINER_NAME = f"bc{PROJECT_NAME}"

FILESHARE_NAME = f"fs{PROJECT_NAME}"

WORKSPACE_NAME = f'ws{PROJECT_NAME}'

STORAGE_ACCOUNT_ID = f'''subscriptions/{SUBSCRIPTION_ID}/resourcegroups/{RESOURCE_GROUP_NAME}/providers/microsoft.storage/storageaccounts/{STORAGE_ACCOUNT_NAME}'''

DATASTORE_NAME = f'ds{PROJECT_NAME}'

DATASET_NAME = f'dset{PROJECT_NAME}'

INSTANCE_NAME = f'inst{PROJECT_NAME}'

TARGET_NAME = f'target{PROJECT_NAME}'
So, the first thing we need to do is create a storage account. The process is shown below, but basically, we have to:
-
Get the management object ResourceManagementClient for resources. We need a credential object and a subscription ID. to do this.
-
Create the resource group by calling the resource_groups.create_or_update method.
-
Get a storage management object StorageManagementClient that will be used to create the storage account.
-
Check if the storage account already exists by calling the storage_accounts.check_name_availability method.
-
Create the storage account by calling the storage_accounts.begin_create method.
# Import the needed management objects from the libraries. The azure.common library
# is installed automatically with the other libraries.

from azure.identity import AzureCliCredential
from azure.mgmt.resource import ResourceManagementClient
from azure.mgmt.storage import StorageManagementClient
import constants

# Acquire a credential object using CLI-based authentication.
credential = AzureCliCredential()

# Obtain the management object for resources.
resource_client = ResourceManagementClient(credential, constants.SUBSCRIPTION_ID)

# Step 1: Provision the resource group.
rg_result = resource_client.resource_groups.create_or_update(
    constants.RESOURCE_GROUP_NAME,
    {"location": constants.LOCATION})

print(f"Provisioned resource group {rg_result.name}")

# For details on the previous code, see Example: Provision a resource group
# at https://docs.microsoft.com/azure/developer/python/azure-sdk-example-resource-group

# Step 2: Provision the storage account, starting with a management object.
storage_client = StorageManagementClient(credential, constants.SUBSCRIPTION_ID)

# Check if the account name is available. Storage account names must be unique across
# Azure because they're used in URLs.
availability_result = storage_client.storage_accounts.check_name_availability(
    {"name": constants.STORAGE_ACCOUNT_NAME}
)

if not availability_result.name_available:
    print(f"Storage name {constants.STORAGE_ACCOUNT_NAME} is already in use. Try another name.")
    exit()


# The name is available, so provision the account
poller = storage_client.storage_accounts.begin_create(
    constants.RESOURCE_GROUP_NAME,
    constants.STORAGE_ACCOUNT_NAME,
    {
        "location" : constants.LOCATION,
        "kind": "StorageV2",
        "sku": {"name": "Standard_LRS"}
    }
)

# Long-running operations return a poller object; calling poller.result()
# waits for completion.

account_result = poller.result()
print(f"Provisioned storage account {account_result.name}")
We can verify that the storage account was created by going to the Azure portal and clicking on the Storage Accounts tab.
 |
|---|
| Storage Account Creation $ |
| - |
We can now create the workspace. We notice that the code is similar to the previous example, but in this case, we are specifying the storage account that we just created.
from azureml.core import Workspace
import os
import constants

config_path = os.path.join(os.path.dirname(os.path.realpath(__file__)), '.azureml')

ws = Workspace.create(name = constants.WORKSPACE_NAME,
                    subscription_id = constants.SUBSCRIPTION_ID,
                    resource_group = constants.RESOURCE_GROUP_NAME,
                    create_resource_group=False,
                    storage_account=constants.STORAGE_ACCOUNT_ID,
                    location = constants.LOCATION,
                    )

ws.write_config(path=config_path, file_name="config.json")
Creating a Datastore and DataSet
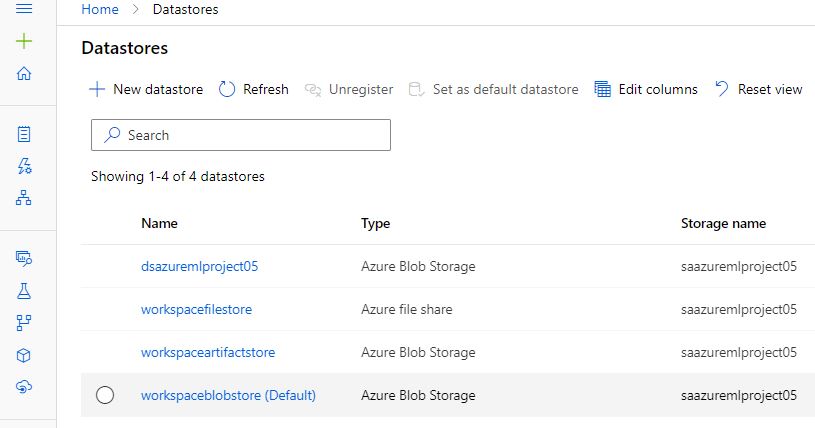
We can now create a dataset with an associated datastore that holds the data used in our ML experiments. We have on our local machine a folder called data that contains a CSV file with some data. The ultimate objective of this section is to create a dataset that points to this data.
We start by creating a datastore. The process is shown below, but basically, we have to:
- Get the storage management object StorageManagementClient as we did previously to create a blob container.
- Create a blob container in the storage account to hold the data by calling the blob_containers.create method.
- The creation of a blob store requires a storage account key. We can get the keys by calling the storage_accounts.list_keys method.
- Finally, we can create the datastore by calling the datastores.create method, linking the storage account and the blob container.
import os
from azureml.core import Workspace, Datastore
from azure.identity import AzureCliCredential
from azure.mgmt.storage import StorageManagementClient
import constants

config_path = os.path.join(os.path.dirname(os.path.realpath(__file__)), '.azureml')
ws = Workspace.from_config(path=config_path)

credential = AzureCliCredential()

storage_client = StorageManagementClient(credential, constants.SUBSCRIPTION_ID)

blob_container = storage_client.blob_containers.create(
    resource_group_name=constants.RESOURCE_GROUP_NAME,
    account_name=constants.STORAGE_ACCOUNT_NAME,
    container_name=constants.CONTAINER_NAME,
    blob_container={})

keys = storage_client.storage_accounts.list_keys(
    constants.RESOURCE_GROUP_NAME,
    constants.STORAGE_ACCOUNT_NAME)

blob_datastore = Datastore.register_azure_blob_container(
    workspace=ws,
    datastore_name=constants.DATASTORE_NAME,
    container_name=constants.CONTAINER_NAME,
    account_name=constants.STORAGE_ACCOUNT_NAME,
    account_key=keys.keys[0].value)

print(f'Created Datastore name: {blob_datastore.name}')
It is now possible to load the data to the datastore. We can call the upload method for the datastore. We notice that the store can ve easily be retrieved from the workspace.
import azureml.core
from azureml.core import Workspace, Datastore
import os
import constants

config_path = os.path.join(os.path.dirname(os.path.realpath(__file__)), '.azureml')
ws = Workspace.from_config(path=config_path)

data_store = Datastore.get(workspace=ws, datastore_name=constants.DATASTORE_NAME)

print(f'Datastore name: {data_store.name}')

data_store.upload(
    src_dir=os.path.join(os.path.dirname(os.path.realpath(__file__)), 'data'),
    target_path='.',
    overwrite=True
)
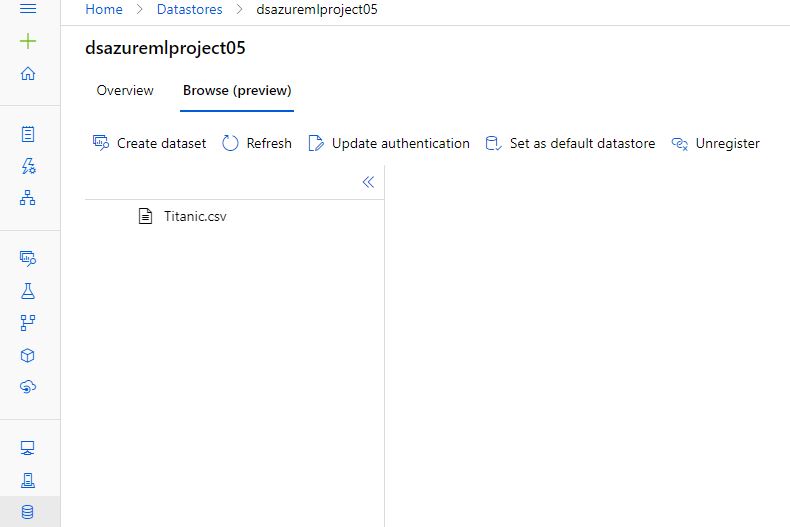
We can verify the created dataset by going to the Azure portal.

Navigating through the datastore, we can see that it also contains the CSV file.

The only remaining step is to create a dataset. We notice that a dataset is created by identifying the data in the datastore as tuples.
from azureml.core import Workspace, Dataset
from azure.storage.blob import BlobServiceClient
import os
import constants

config_path = os.path.join(os.path.dirname(os.path.realpath(__file__)), '.azureml')
ws = Workspace.from_config(path=config_path)


data_store =  ws.datastores[constants.DATASTORE_NAME]

data_path = [(data_store, './titanic.csv')]

data_set = Dataset.Tabular.from_delimited_files(path=data_path)

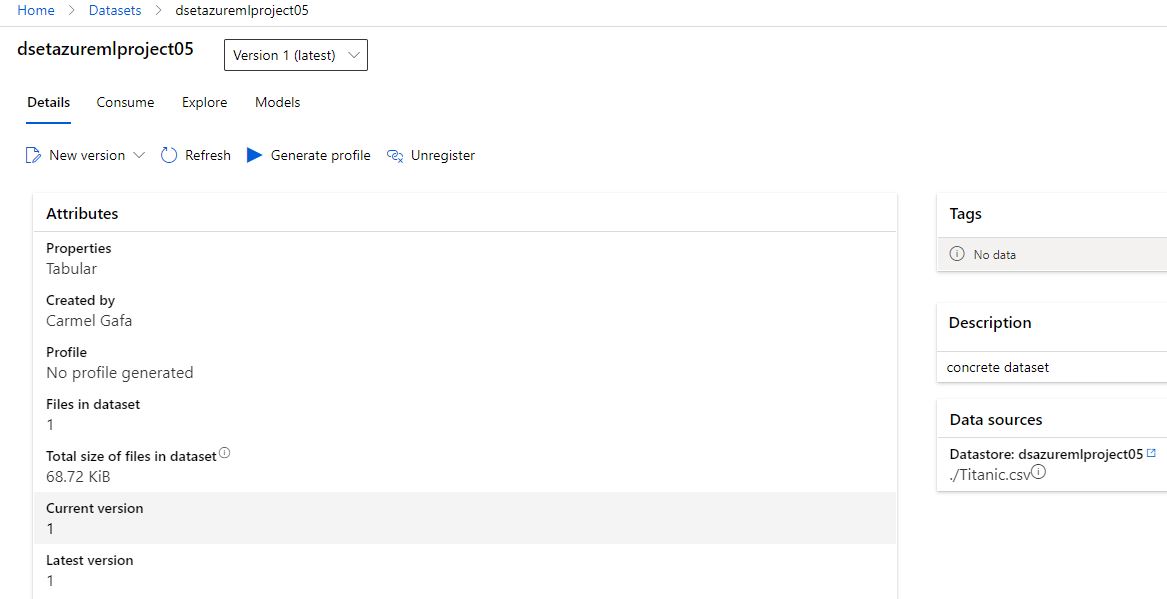
data_set.register(workspace=ws, name=constants.DATASET_NAME, description='concrete dataset')
We can verify the created dataset by going to the Azure portal. Upon examining the dataset, we can see that it is linked to the datastore and the data.

Computes
Create Compute Instance
Creating a compute instance is shown below. It starts with an attempt to use the instance through the ComputeInstance constructor, which requires a workspace object and a name for the instance. The constructor throws an exception if the instance does not exist, and in this case, the instance is created. This is achieved by first creating a provisioning configuration object, which is then used to create the instance by using ComputeInstance.provisioning_configuration. The provisioning configuration object is then used to create the instance by using ComputeInstance.create. We wait for the instance to be created by using ComputeInstance.wait_for_completion.
import os
from azureml.core import Workspace
from azureml.core.compute import ComputeInstance
from azureml.core.compute_target import ComputeTargetException
import constants

config_path = os.path.join(os.path.dirname(os.path.realpath(__file__)), '.azureml')

ws = Workspace.from_config(path=config_path)

VM_SIZE='Standard_DS11_v2'

try:
    compute_instance = ComputeInstance(
        workspace=ws,
        name=INSTANCE_NAME)

    print("Found existing compute instance. Using it...")

except ComputeTargetException:
    compute_config = ComputeInstance.provisioning_configuration(
        vm_size=VM_SIZE,
        ssh_public_access=False)

    compute_instance = ComputeInstance.create(ws, constants.INSTANCE_NAME, compute_config)

    compute_instance.wait_for_completion(show_output=True)
Create Compute Target
Compute targets are created similarly to compute instances, but in this case, an Azure ML compute manager, AmlCompute is used to create the compute target. Notice that the target was created in the low priority tier and that our quota allows us to have a maximum of 2 nodes of the selected VM size.
from azureml.core import Workspace
import os
from azureml.core.compute import ComputeTarget, AmlCompute
from azureml.core.compute_target import ComputeTargetException
import constants

config_path = os.path.join(os.path.dirname(os.path.realpath(__file__)), '.azureml')
ws = Workspace.from_config(path=config_path)

VM_SIZE='Standard_DS11_v2'

try:
    compute_target = ComputeTarget(
        workspace=ws,
        name=TARGET_NAME)

    print("Found existing compute target. Using it...")

except ComputeTargetException:
    compute_config = AmlCompute.provisioning_configuration(vm_size=VM_SIZE,
                                            vm_priority='lowpriority',
                                            idle_seconds_before_scaledown=120,
                                            min_nodes=0,
                                            max_nodes=2)

    compute_target = ComputeTarget.create(ws, constants.TARGET_NAME, compute_config)

    compute_target.wait_for_completion(show_output=True)
Conclusion
In the next post, we will see how to use what we have created to execute a Machine Learning experiment.